DIY · Family · Renovation

DIY…….Baby steps

I’m not gonna lie, I love a good crafty project.  I love making gifts and Christmas decor, crocheting, and making jams and jellies, but messing with wood is on a whole other level for me.  I think I feel as if I’m gonna mess the wood up and then there’s no going back.  Sooooo, I took on a kitchen project and decided to get back to working on it this past week.

About a year ago we got a new kitchen table(new to us) that came with a bench. The way our kitchen is,  the kitchen table sits up against a big window. So my reasoning is the bench will go better up near the window than some chairs, plus I can fit 3 kids on a bench instead of 2. Anyways, the table and bench are both light oak with antique white legs. The chairs I had just bought were a dark walnut with antique white back and legs.  My project is to stain the table top and top of bench to the dark color matching the chairs.   In my head it was super simple, sand the finish off, wipe on some stain (maybe 2 coats), then paint on a layer of poly-urethane. Easy peasy!  Well…….things aren’t always as easy as they seem.


First things first, I started with the bench. It’s smaller and if I mess it up I figured it wouldn’t be as noticeable as our actual table.  I got out my little hand held sander and sanded the finish off in just about 30 minutes or so.  I thought to myself, “yep I got this….just like I planned”.  Well, 3 months later the sanded, unfinished bench is still in my kitchen.  So I’ve spent the summer with 3 different colored woods in my dining set.  Oh well, life is busy and sometimes you just gotta chill..you know?  Ok, back to it though. This past week I got it out to the garage and started the staining process.  I cleaned it off really well and started wiping the stain on with an old soft rag we had. I used MinWax Wiping Stain, basically because it looked like the simplest route.  I wiped the whole bench top down moving in the direction of the wood grain. I let it sit for 3 minutes, then I wiped off the excess in the same direction as the wood grain as well.  After wiping off there a few spots that had a much lighter stain so after 4 hours of drying I reapplied the stain to the areas I wanted it to be darker.  So far, so good.


All was looking good and going to plan.  The next step was to add a coat or two of poly-urethane to help protect the wood and keep it’s finish.  I used the MinWax fast drying clear poly-urethane.  I used a soft brush to apply the varnish. All seemed well at first, until the next day after allowing for 12 hours dry time. I ran my hand along the bench to see if it was dry, and it was. However, there was these spikey pit things all over it.  At first I just looked at it and considered just letting it go, mainly because I wasn’t sure why it was like that, but after much examination I realized that the grass, dirt and dog hair that gets blown around in our garage, had in fact landed on the poly-urethane while it was drying.  Not what I was in the mood for at all.

So after sulking for two days, I sanded down the pitty areas (which didn’t take as much stain off as I had thought it would).  The bench was smooth again and I applied a little more stain to those areas that needed it.  This time I cleaned up and swept up the garage and made sure no one would be pulling the lawnmower or any vehicles in and out of the garage for at least a day while this sucker was drying. The next day I had myself a beautiful bench that matches my chairs!! Woo-hoo!! Now I just gotta get myself moving on the table….that’s  why I called it baby steps..lol

DIY · Essential Oils · Gardening · Skin Care · Summer · travel · Wellness

Summertime Essential Oil Must-Haves…

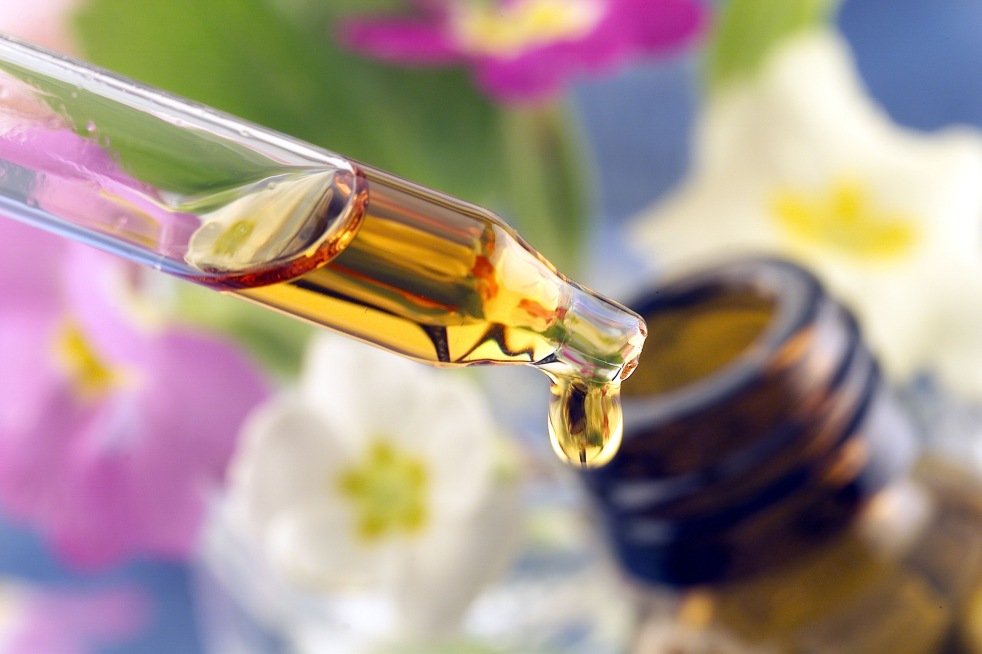
Alright guys, if you love essential oils and can’t live without them, or if you’re just curious and wondering what this oil craze is all about…I have put together a list of the top 10 must-have essential oils for summer.

I must start up by saying that I’m not going to push a particular brand on you or bash any other brands that I don’t use…for some reason there tends to be this rivalry among oil users to convince others that your brand is the best.   With that said, I have to reiterate that pure quality oils are a must, or they simply won’t be effective, and can even cause harm.  You cannot buy quality oils at the grocery store (not even organic chains), pharmacies or over the counter.  You pretty much have to order from an essential oil company or through someone who sells for the oil companies. If a company’s main focus is not on essential oils I can guarantee that their oils are not 100% pure, organic or therapeutic grade oils. Now,  I know you’re thinking it and yes I do have a company that I use and trust for my family and business.  I could go into a whole other post about why I choose this company, but for now we’ll just say they are 100% pure, organic and grown in the most natural state that the plants thrive in.

Ok, so now onto to the summer must-have list! I will list them from 10 to 1, 1 being my favorite and/or most useful for summer.

10. Vacation Car Oils –  Can I get an amen?!  If you have kids, this is vital in order for your family to arrive at your vacation destination with your sanity and the majority of your hair.   For my family it has double purposes.  I have 3 members of my family that get car sick…seriously bag carrying, pulling over in the nick of time…car sick.  So, it is a must for me to carry peppermint oil and the digestion blend, Digestzen.  Simply applying to the stomach and even just smelling these can ward off this awful feeling for my family.  Secondly, I carry relaxing oils like Lavender, a grounding blend called Balance and a calming blend called Serenity.   You can imagine the value these calming oils can have on a van full of bad attitudes, restless legs and cooped up kiddos.  On a road trip these are priceless to me!!


9. Poison Ivy Blend– Also, a yearly tradition is for someone in our house to get poison ivy or poison oak.  I can testify it is awful and so annoying to have that constant nagging feeling to scratch.  For this you can use Lavender “neat” (undiluted – full strength), or Cypress and Peppermint with just a few added drops of Witch Hazel.  Apply as often as needed.  (Caution: limit use of Peppermint on little ones under 1 year old).


8. Allergy Blend– For those summer allergies like Ragweed…whatever may be the trigger… LLP is the relief you need.  Lemon, Lavender and Peppermint blended with a carrier oil (like coconut oil) is a great way to use it topically, but diffusing and/or taking it orally are very effective as well. Remember, do not take essential oils internally if the company advises against it.  My company does inform you if an oil is safe to be ingested or not.


7. Cooling Mist Spray– Oh my goodness, I can’t tell you how great this trick is when you’re standing in line at Disney or some amusement park roasting in the sun.  All you need is Peppermint oil, water and a spray bottle.  The cooling effect peppermint has on you is remarkable. Tests can actually prove that peppermint can lower your body temperature.  Hint: those fan spray bottles (like at Disney) are even better with just couple added drops of peppermint!


6. Super Sleep Blend– Alrighty, I’m just being real. Summer can be hard for us parents to get our kids to bed…and let’s face it, we need quiet time occasionally in order to be fully functioning adults.  There are usually a couple nights a week where I have to whip out this sleep blend to get my rascals to bed.  I blend 30 drops Serenity (restful blend), 15 drops Lavender and 10 drops Vetiver all in a roller bottle with FCO (Fractionated Coconut Oil).  Roll it on wrists, pillows, and (if necessary) on the bottoms of feet and behind ears.  It works like a charm…even for my night owl.


5. Bug Bite Blend– If your family is like mine, and you’re outside a lot, then without fail, someone probably forgets to apply bug repellent and you end up with itchy, scratchy kids.  This blend is a great relief for them when they just can’t stop scratching.  There’s actually 2 variations of this blend, and both are great. First is 25 drops Lavender, 15 drops Melaleuca mixed with some FCO in a roller ball, applying to bites as needed. Second is the allergy blend listed above as #8, which also works well for bug bites.

4. Stress and Anxiety Blend (Chill Out)– This blend is a must for me when the whole day (for whatever reason) has been difficult or just plain impossible.  This is a 50/50 blend of Serenity and Balance(grounding blend).  Add 30 drops of each, topped off with FCO, to a roller bottle and you’re set. Roll that sucker on your wrists, behind ears, back of the neck, over your heart…maybe not all at once…but really find the area that works best for you, and reapply until your sanity has returned.


3. After Sun Spray– OMG, it’s hard for me to contain my excitement for this blend!!! It has helped me and my kiddos when we have gotten too much sun, and (well, let’s face it) when I (mom) have forgotten to reapply the sunblock.  No more sleepless nights or chills from being severely burned. I apply this blend at the first sight of pinkness on any of us.  I generally apply 2 times before bed and by morning we’re usually tanned already. If not, keep applying. It not only tans, but it also removes the heat from the burn and helps to prevent peeling as well.  The blend is simply 20-25 drops Lavender and 8 drops Peppermint filling the rest of a 2oz spray bottle with FCO.

2. Lavender– Yep, that’s all.  Lavender is a must around the pool and to have readily available if your kids run barefoot outside.  I’m not kidding when I say Lavender will take out a bee sting or wasp sting…any sting…in a matter of seconds!!  Someone in my crew, without fail, always manages to get stung by the pool, and Lavender is my life saver.  I rub it onto the sting area and count to 3 and they’re already jumping back in the pool…after screaming just seconds before from an awful sting.  Seriously, this makes my mom job so much easier!


1. Bug/Pest Repellent– Yes, this is a must-have for our family.  Three of us I think attract bugs from the neighboring counties!  So, I spray us all down…including my dog! It’s non-toxic, and I don’t have to fret over wether or not they get a bath every time I apply this repellent like I did when I used products containing Deet and other harmful chemicals.  The blend consists of  25 drops Terrashield, 8 drops Peppermint, 8 drops Lavender, 8 drops Lemongrass and 6 drops Cedar Wood with the remaining amount of the 2oz spray bottle being filled with spring (or distilled) bottled water.  Be sure to shake well before each use, and you can reapply as needed. Click here for more info on this blend. 


So…there you have it!!  The top 10 oils to make your summer easier and more enjoyable.  If you’re needing a place to buy quality essential oils, click here to access my website.  Feel free to contact me for more information, or with any questions you may have about essential oils.  

Canning · DIY · Food · Frugal · Gardening · Preserving · Summer

When in doubt…pickle.

The bees are busy and buzzing in our backyard this time of year! We have a full garden with lots of blooms for them to visit. Not to mention we have a yard of clover that we purposely do not spray with chemicals just for their well being. I try to take care of them and they take good care of our garden plants and fruit trees. In particular this time of year we rely on them to pollinate our cucumber plants. There’s nothing quite like the smell and taste of a cucumber straight out of the garden. Those waxy specimens you get at the grocery wane in comparison. When the cucumber bounty is coming in, we are using them every way we can think of; in salads, as crackers and of course we make pickles! In our house we love little jerkin pickles. The beginning of the growing season is the best time to get the most “little”cucumbers all at once. You can do whatever size you like, spears, slices or whole pickles. The process for all of them is the same. If you’re a beginner canner I highly recommend trying pickles first. They’re so easy to make and they help you understand the process you need to do in order to can.

Canning can be done using a water bath canner or a pressure cooker. When canning pickles, jams, jellies, fruit butters, tomatoes, salsa, pretty much any fruit or vegetable that is acidic a water bath canner is safe to use, but for meat and starchy vegetables like green beans and corn you need to use a pressure cooker to ensure the temperature gets hot enough to eliminate any harmful bacteria that can spoil your food. However, tomatoes of any kind can be canned in both a water bath or a pressure cooker, a pressure cooker just shortens your processing time from about 45 minutes to about 15 to 20 minutes. For pickles you will always use a water bath canner, a pressure cooker would cook the cucumbers and they’d be very soft and soggy. Because of the vinegar used in pickling, making them acidic, a water bath canner is the preferred method to canning pickles. The same is also true for jellies, jams, and fruit butters in that a water bath canner is the easiest and generally preferred method of canning. In the pictures below is my water bath canner on the left and a pressure cooker on the right. I do have one, but they’re super heavy and I didn’t feel like digging it out for a photo shoot.

Ok, so first things first, you pick your cucumbers and give them a good cleaning in the sink. You’ll also want to make sure you have plenty of clean jars. Go ahead and halfway fill your canner with water and put your jars in to have them sanitizing in hot water. A canner holds 7 jars so I usually try to have at least 8 jars ready. Now, back to the cucumbers, start slicing or preparing them based on what kind of pickles you want (slices, spears, whole, etc…). Remove your sanitized jars from the canner using a jar lifter and carefully place them on a kitchen towel. Hint: hot glass is temperamental and can crack and break easily. You can then begin stuffing the jars as tight as possible with your cleaned and cut cucumbers. Try to get the jars as full as possible so you don’t have to use as much pickle brine and also so there is less air in the jars which can lead to shorter shelf life.

20170624_134953_resized

Now, once jars are full of cucumbers, you start getting your pickle juice cooking on the stove. I use a pickle mix, Mrs.Wages kosher dill mix. You do not have to do this, I just love the quality, convenience and consistency of the mix. There is directions on the back for the measurements of water, vinegar and pickle mix. It’s pretty straight forward you combine all the ingredients and bring it to a boil. Once your brine is boiling, remove from the stove and place near your stuffed jars. One by one using a ladle and canning funnel fill your jars within a half inch from the top rim. Once all jars are filled, wipe the rims to remove any spilled liquid and then cap the jars with your heated ring and lids. Put them on together and just hand tighten, don’t over tighten or your jar can bust in the canning process.

Alrighty, jars are filled with cucumbers and hot brine and they’ve also have lids. The next thing to do is get your jars into the water bath canner. Using your jar lifters, one by one carefully place the jars into the rack inside the canner. When all 7 jars are in canner, put the lid on canner and double check the heat is on high. You want to get the canner up to boiling as quick as possible so that you have good and crunchy pickles. Once you see steam coming from the lid you can begin counting your processing time, which for pickles in pint size jars is 10 minutes. Once your 10 minutes is up remove your jars using jar lifters again and place the jars one by one onto a kitchen towel. You do this because placing them on a cool countertop can bust a jar. Always, always use towels on the counters when canning. The pic below is a typical jar lifter used in canning.

Before long, probably within a few minutes you should hear the magnificent sound of your jars “popping” and therefore sealing. Woo-how you did it! Easy-Peasy!! Just repeat this process until you run out of cucumbers and brine. Your pickle loving self/family should have tasty pickles for the year to come. This whole process only takes about 2 hours. It’s a great way to get your feet wet in canning. If I can do it, you can do it. Good luck on your canning adventures. Here’s batch 1 of 2 for me from last Saturday!

20170624_145417_resized.jpg

Canning · DIY · Food · Gardening · Preserving · Summer

We Be Jammin’

Oh the sounds of summer: kids playing, pools splashing, late night music, frogs croaking, crickets chirping and jars sealing. You gotta admit those are some good times…yep, I really said jars sealing. Growing up I spent many summer days and nights helping and watching my Mamaw can green beans, tomatoes, pickles, and jams. I grew accustomed to hearing those jars pop all night long as they were cooling off and sealing.  That was the sound of sweet success!! Now that I’m grown with a family of my own, and my grandmother has long since left this world, I can’t wait for my first canning every year. To hear those familiar pops takes me back to my Mamaw’s kitchen. How I’d love for her to see me canning like she did.

Nowadays in our home, my babies get excited each time a jar pops. They know all our effort is paying off. I think they also know that the strawberry or blackberry jam is gonna be awesome for breakfasts and on their PB&J’s too! These moments are the ones I cherish, and I can only hope they will too.

If you’ve never canned before, in my opinion, jam or pickles are the easiest for getting started. I’m just gonna give a brief run down of the basics to canning strawberry jam from start to finish. For any of you out there who are kinda skittish about canning, or maybe think it’s too much trouble, I hope this brings clarity to any questions you may have.

First things first, wash and cut your strawberries. Try to have good, firm, ripe berries. You really don’t want bruised or over ripe fruit. (Canning rule of thumb is: high quality in = high quality, long-lasting canned goods.)  Once you’ve washed and cut berries into halves or fourths, then you smash or crush them. I use my meat masher thingy from Pampered Chef to get them good and crushed.

From there you follow the recipe on the pectin box or container. I use Ball brand fruit pectin. It gives you exact measurements for your strawberries, pectin, and sugar. I’m pushing my recipe to the max (be careful when tripling or quadrupling jams/jellies) with 8 cups crushed berries, 8 TBSP pectin, and 9 cups sugar. Add strawberries and pectin first to the pot with 1Tbsp butter. Bring this mix to a full rolling boil. Once it can’t be stirred down, add all of your sugar to the pot. Bring this mix back to a full rolling boil. Let it boil hard for one minute, stirring constantly.


While all that’s going on, have your jars heating (sanitizing) in the water bath canner. You also need to have your rings and lids heating up in a smaller pan. This way once your jam is finished boiling, your jars and lids will be ready to go as well. Ok, rolling boil has done it’s minute, now your ready to jar and lid your jam. Simply ladle your mix into your jars, be sure to use a canning funnel. Fill each jar within a 1/2 inch from the top. Fill up all your jars, wipe the top edges of each jar to remove any loose jam, then top them with the hot lids and rings. Once all the jars are topped, use a canning lifter to place jars gently in the water bath canner. Put the top on the canner and wait for the boil to come back. When it begins to boil again (you’ll see steam coming out of the lid) that’s when you start your timer. For jam, processing (boiling) time is 10 minutes. After 10 minutes of processing, remove jars with jar lifters and place on a kitchen towel. Let them sit here to cool and seal. You’ll hear them within a few minutes start popping, which is the evidence of sealing. It’s a wonderful sound…I love it!

Let the sealed jars continue to cool overnight without moving if possible. You can eat immediately, but I generally recommends letting them cure for a week to ensure full setting and flavor. After all of your effort, you now have some amazing jam to last you throughout the year. Just a little added hint: homemade jams and jellies make great gifts.

Good luck…and happy canning!

20170617_185538_resized


DIY · Essential Oils · Skin Care · Wellness

Let’s Talk About Skin, Baby: Part 1

Skin is an incredible thing.  For starters, it’s an organ!  In fact, it’s the largest organ in (or on, rather) the human body.  It accounts for about 15% of your total body weight, and every 28 days, your skin actually renews itself!  Wow, that’s truly amazing!!

Even though it is located on the outside of your body, you should still be very careful of how you treat your skin.  It isn’t just a protective covering.  Though it does renew and regenerate, your skin is still a very delicate part of your body.  You can do permanent damage to it if you don’t take care of it, and that permanent damage can not only harm your self-esteem, but it can also cause other health issues (infections, skin cancer, and nerve damage, just to name a few).

So I just wanted to share a few things with you that I have learned about my own skin — issues I’ve dealt with and how I dealt with them.  This will be a multi-part series of posts (probably just two…maybe three), because of the huge amount of information that there is on this important topic.  So please stay tuned for more!  So, let’s jump in!

I love lists, and I think they make for easier and more efficient reading of informational texts, so I’ve made a list that will hopefully be easy for you to scan through to the things that apply to you or someone that you know.

I’m going to begin with the most aggravating skin condition of all (at least, it is to me):  acne.

  1. Acne:  I didn’t encounter this issue until I was WELL into my adult years.  Mine was caused by PCOS (Poly-cystic Ovarian Syndrome).  I had never dealt with this as a teenager, so I didn’t know what to do about it!  It was very humiliating to me, to have so many pimples.  It was never truly severe for me, thank goodness, but the bumps were very large and very painful — wounding both my pride and my skin.  A lot of what I have learned about treating acne at home has been by trial and error.
    • Causes: oil production, dead skin cells, clogged pores, hormones, medications, diet, and stress
    • Remedies:  (These are remedies that I have tried and tested that have worked for me.  I am not going to guarantee that any of them will work for you, but I will never share something that hasn’t had a positive impact on my life.)
      • Green Tea/Honey Mask:  (I use this concoction at least twice a week to exfoliate, soften, clarify, and purify my skin and its pores.  It can be used anywhere on your body that you are having problems.  I love this mask because it makes an immediate difference in the way your skin looks and feels.)
        1. Brew a cup of green tea and let it cool.
        2. Mix a couple tablespoons of the tea with some honey, some sugar, and some apple cider vinegar (ACV) to make a thick paste.  I just keep adding the ingredients until I’m happy with the consistency and then slather it on thick, massaging into the skin as I go.
        3. Let it sit for about 15-20 minutes, then rinse off with warm water.
      • Essential Oils:  (I use DoTerra brand, because it’s the only brand I’ve ever used and they have done wonders for my skin and overall health in many different ways.  Click here to visit Stephanie’s DoTerra site for ordering and/or more information about these glorious oils.)
        1. Acne Roller Ball:  (I use this on breakouts every time I wash my face…before moisturizer.)
          • 10 drops melaleuca
          • 10 drop lavender
          • 5 drops lemongrass
          • 5 drops frankincense
          • 6 drops rosemary
          • fill remainder of bottle with fractionated coconut oil (FCO) – this is just a carrier oil that dilutes the oils and makes application easier
        2. OnGuard:  This is a DoTerra blend that contains wild orange, clove, cinnamon, eucalyptus, and rosemary oils.  It has many uses, and is not typically used for acne treatment, however it is recommended for inflammation, so I had the bright idea to put it directly on blemishes and it works beautifully!  I don’t dilute it with any FCO (fractionated coconut oil).  I just put a drop of it on my finger and dab away.  It almost immediately takes out redness and swelling, and within a day the zit is basically gone.  LOVE IT.
        3. Skin Soothing Essential Oil Cream:  This is a blend of essential oils that is mixed with equal parts raw coconut oil and organic shea butter.  It is highly moisturizing and is perfect to slather on at night.  Plus, it smells divine.  It feels like a small luxury to me when I use it.  I use it on my face, as well as on other areas of my body with problem skin…even my feet.   To make, simply add the following oils to the coconut oil and shea butter.  (It’s a good idea to slightly warm both before adding the essential oils for easier mixing.):
          • 5 drops geranium
          • 4 drops lavender
          • 2 drops myrhh
          • 3 drops cypress
          • 5 drops franincense
      • Washing and Moisturizing:  Lipids are very important.  They are what keep the outer layer of your skin moist and healthy.  When you use harsh chemicals on your skin, you strip away these lipids causing dryness.  Your skin will, in turn, begin to go into overdrive trying to re-hydrate itself by creating excess oils.  When these excess oils mix with dead and dry skin cells in your hair follicles, they create a nice little breeding ground for bacteria, thus causing breakouts of acne.  So, make sure you are using a mild soap to remove dirt and makeup.  I like to use a Castile soap because I know it will be pure, having very few ingredients and zero harsh chemicals.  Dove Soap, white beauty bar, is also an excellent choice that is dermatologist recommended.  Unless you have been sweating or have to remove makeup, don’t bother with using any soap — warm water will open up your pores and cleanse your skin in the mornings.  Also, always moisturize while your skin is still slightly damp.  Moisturizing is KEY to acne prevention!  I promise!!  Just make sure that you are using a light, mild moisturizer that will not clog your pores.
      • Diet:  It has been argued back and forth for years and years about whether or not what you eat affects the condition of your skin.  While some of the information is based on myth (like the indication that oily and fatty foods cause acne), it is true that diet does, in fact, play a large role in what your skin looks like.  Your diet affects your hormones, which in turn can cause acne.  If you are having trouble with your skin, I would suggest cutting back on sugar and carbs.  Increase your fiber and your healthy fats, and limit your dairy.  Also, spring for the organic and grass-fed food items.  The extra hormones that are pumped into the cheaper foods are absolutely TERRIBLE for your skin and just for your overall health.  And as far as fats go, they are actually fantastic for your skin.  As I said earlier, keeping your skin’s oil production at a steady level is ideal.  You want your body to produce those natural moisturizers.  A few months back, I was having a very rough time with my hormones due to my PCOS.  My skin was constantly broken out in acne, and one of the things that I decided to do was to go on the Ketogenic Diet.  I began this way of eating back in March, and my skin has cleared up wonderfully.  There is a lot of information out there about this diet, and I will post a link below to a previous blog I wrote about it if you want to learn more.  It is basically a low carb, high fat way of eating that helps control your insulin levels and helps your body learn to burn fat stores.  It also has many other health benefits, one of which is healthier skin.
      • Informational Links:
        1. DoTerra Essential Oils (distributor:  Stephanie Williams – aka – “Nitty”):  You can find out more about essential oils and/or how to order them here.  Just click the link above!
        2. That Weird Keto Thing (link to an earlier post that I wrote about The Ketogenic Diet)
        3. The Mayo Clinic – Acne Basics (this is an excellent source of information about causes, risk factors, and myths to help you make informed decisions about skin care, per expert doctors)

So that concludes my spiel on the dilemma that is acne!  I speak from personal experience, and while not everyone’s skin is exactly the same and may not react to products in the same ways, much of what I have shared here is mild enough to be universally helpful.  As always, feel free to contact Nitty & Gritty with an email or a comment!  Thanks for reading, and I hope what I’ve written has been of some help to you.  I will continue this series in two weeks with the next few items on my list of skin woes including:  Eczema, Shingles, Aging Skin, and Sensitive Skin/Sunburn.  So stay tuned for more…